Get into the holiday spirit with these fun and easy Christmas craft ideas that kids will love making!
One of the true joys of the season is watching the excitement on your children’s faces—and you don’t have to wait until Christmas morning to bring that festive cheer into their lives.
With these simple and adorable craft projects, you can kickstart the holiday magic right now.
The best part of Christmas isn’t just the day itself; it’s the weeks leading up to it. Picture the sound of little giggles, the rustle of colorful paper, and the twinkle in their eyes as you craft together.
From making twinkling ornaments for the tree to creating a personalized advent calendar, these projects offer a perfect way to bond while bringing your home to life with holiday cheer.
Here are 7 fun and easy Christmas craft ideas that will fill your home with joy, laughter, and a little holiday magic:
7 Fun and Easy Christmas Craft Ideas
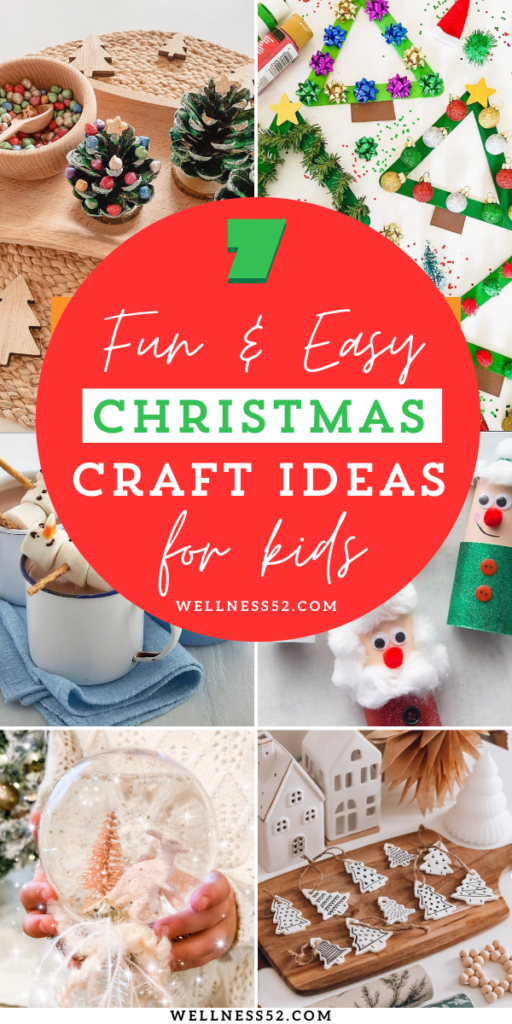
Spread holiday cheer with fun and easy Christmas crafts! Perfect for kids. Keep little hands busy and add festive touches to your home
1. Pinecone Christmas Trees
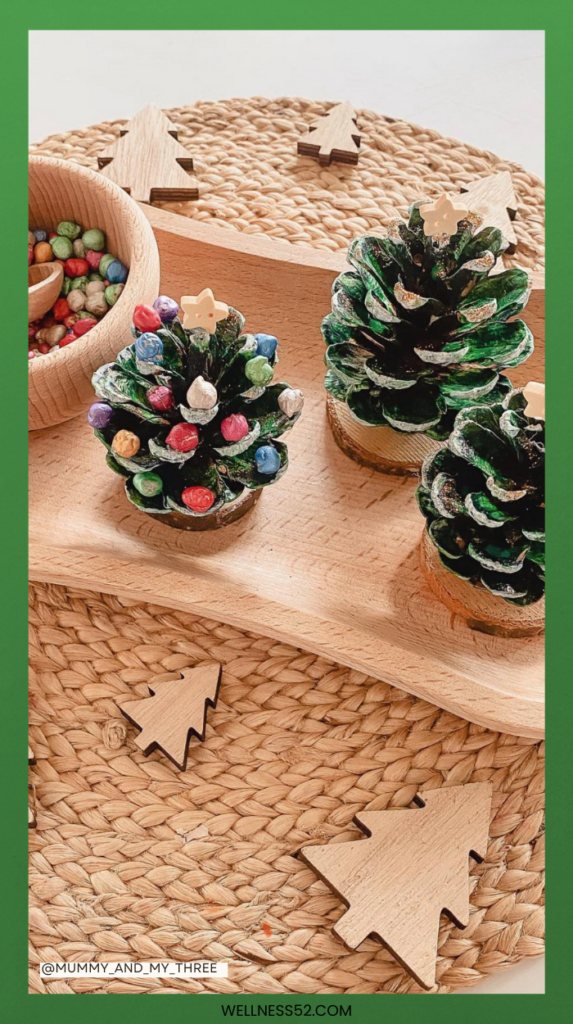
Turn ordinary pinecones into mini Christmas trees with a bit of paint and glitter.
Let your kids paint the pinecones green, and once dry, add dabs of glue and sprinkle glitter for a sparkling finish.
Top it off with a tiny star or pom-pom for the tree topper.
Materials Needed for Pinecone Christmas Trees (for 5 trees):
- 5 pinecones
- Green acrylic paint
- Paintbrushes
- Craft glue
- Glitter (various colors)
- 5 star-shaped buttons or cutouts
- pom-poms or dried chickpeas (for decorations)
- Sturdy cardboard pieces or small wood slices (for tree bases)
- Scissors (for cutting cardboard, if needed)
- Newspaper or a protective mat (to protect surfaces while painting and glittering)
Optional:
- Miniature decorations like tiny beads or buttons for extra ornamentation
Photo: Instagram @mummy_and_my_three.
Pro Tip: Use a sturdy piece of cardboard or wood as the base for the trees, and let the kids arrange them into a mini forest centerpiece.
2. Salt Dough Ornaments
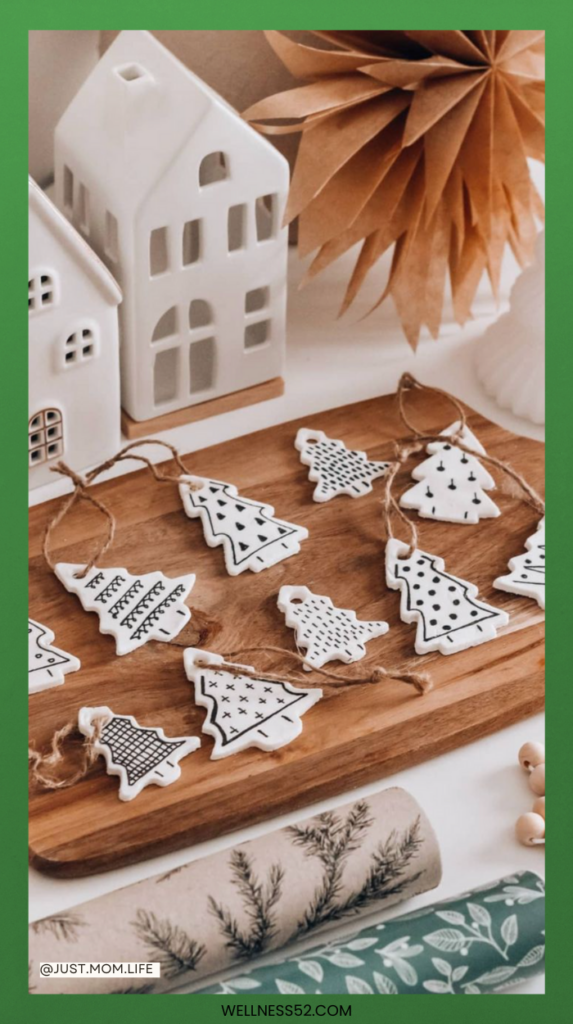
Make personalized ornaments using simple salt dough.
Roll out the dough, use cookie cutters to create shapes, and have your kids decorate them with paint, glitter, or markers once baked and cooled.
Here is one salt dough recipe that’s so easy to make!
Ingredients:
- 1 cup cornstarch
- 2 cups baking soda
- 1 1/4 cups water
Instructions:
- Combine: In a saucepan over medium heat, mix the cornstarch, baking soda, and water until the mixture forms a thick paste.
- Cool: Transfer the paste to a reusable parchment paper sheet and let it cool completely.
- Knead: Once cool, knead the dough until smooth and pliable.
- Shape: Use cookie cutters or your hands to create your desired shapes and designs.
- Bake: Preheat your oven to 180°F (88°C). Place the shaped dough on a baking sheet and bake for 50 minutes on each side.
- Finish: Let the baked dough cool completely before painting or leaving it plain.
Enjoy your homemade creations!
Photo: Instagram @just.mom.life
Pro Tip: Don’t forget to poke a small hole at the top before baking so you can string ribbons through and hang them on the tree.
3. Popsicle Stick Christmas Trees
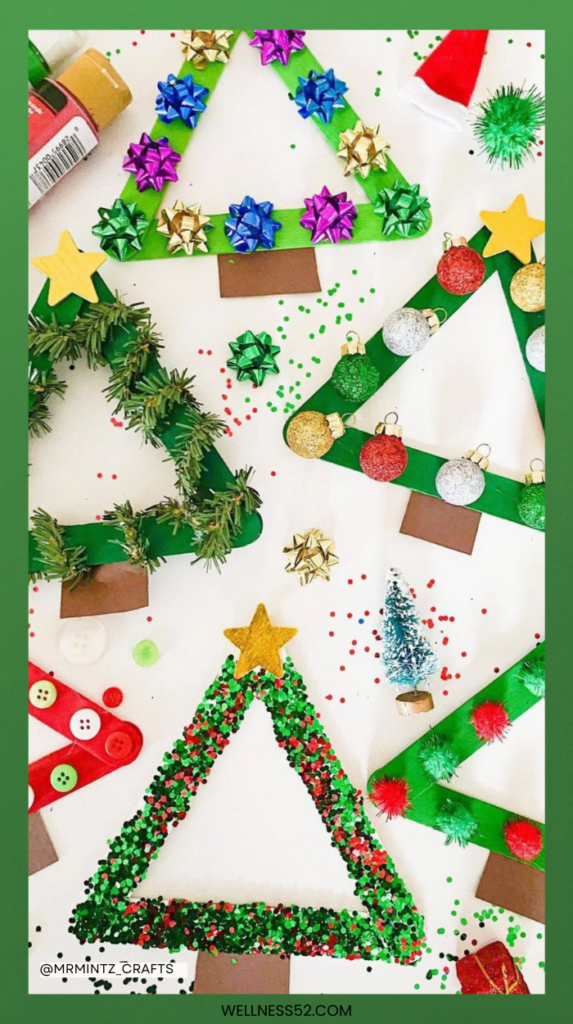
Popsicle sticks can be easily turned into cute and festive Christmas trees.
Glue the sticks into a triangle shape to form the tree base. Let the kids paint the sticks green and add colorful decorations like beads, buttons, or glitter to mimic ornaments.
Top it off with a star sticker or cutout for the finishing touch.
Materials Needed for Popsicle Stick Christmas Trees (for 5 trees):
- 15 popsicle sticks (3 per tree)
- Hot glue gun and glue sticks
- 5-star stickers or cutouts (one for each tree)
- Assorted buttons
- Mini ornaments
- Pine pipe cleaners
- Glitter (in various colors)
- Pom-poms
- Small bows
- Ribbon (for hanging, optional)
- Scissors
Optional for added decoration:
- Markers or paint (for coloring the popsicle sticks green or other festive colors)
- Craft glue (for attaching decorations)
Photo: Instagram @mrmintz_crafts
Pro Tip: Attach a small piece of ribbon to the top of the tree, so it can be hung on the Christmas tree or used as a holiday decoration.
4. Handprint Reindeer
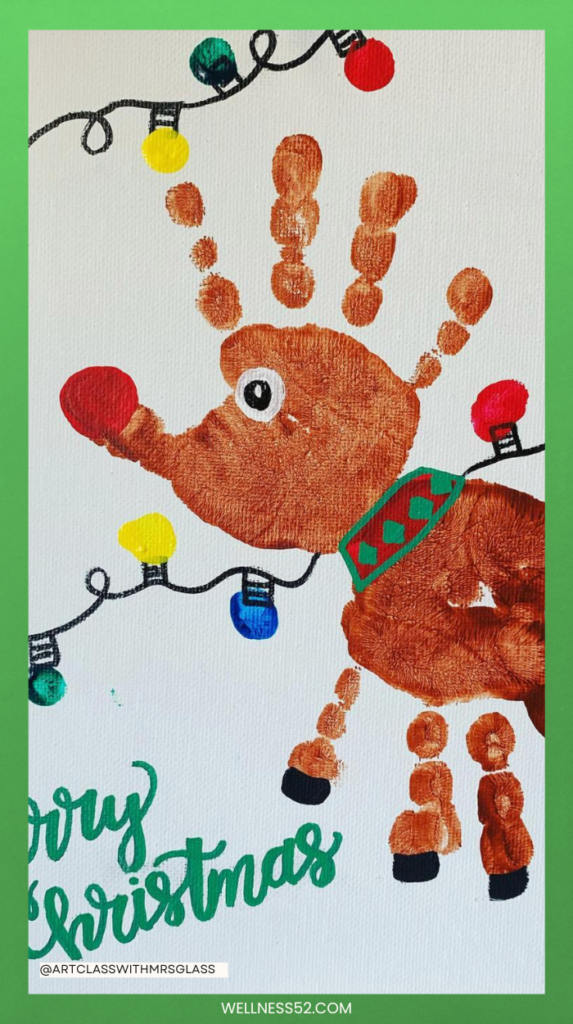
Capture the memory of your child’s little hands with handprint reindeer. Use brown paint to create handprints on paper, and add googly eyes and a red pom-pom nose for Rudolph.
Your kids will love seeing their artwork turned into cute reindeer!
Materials Needed for Handprint Reindeer (for 5 reindeer crafts):
- Brown washable paint
- White or light-colored construction paper (5 sheets)
- Googly eyes (10 pairs)
- Red pom-poms (5 for noses)
- Paintbrushes or sponges (for applying paint to hands)
- Craft glue (for attaching googly eyes and pom-poms)
- Black or brown marker (for drawing antlers and details)
- Paper towels or wipes (for cleaning hands after painting)
Optional:
- Frames (if you want to frame the handprints as keepsakes)
Photo: Instagram @artclasswithmrsglass
Pro Tip: Frame the handprints to make it a keepsake you can pull out every holiday season.
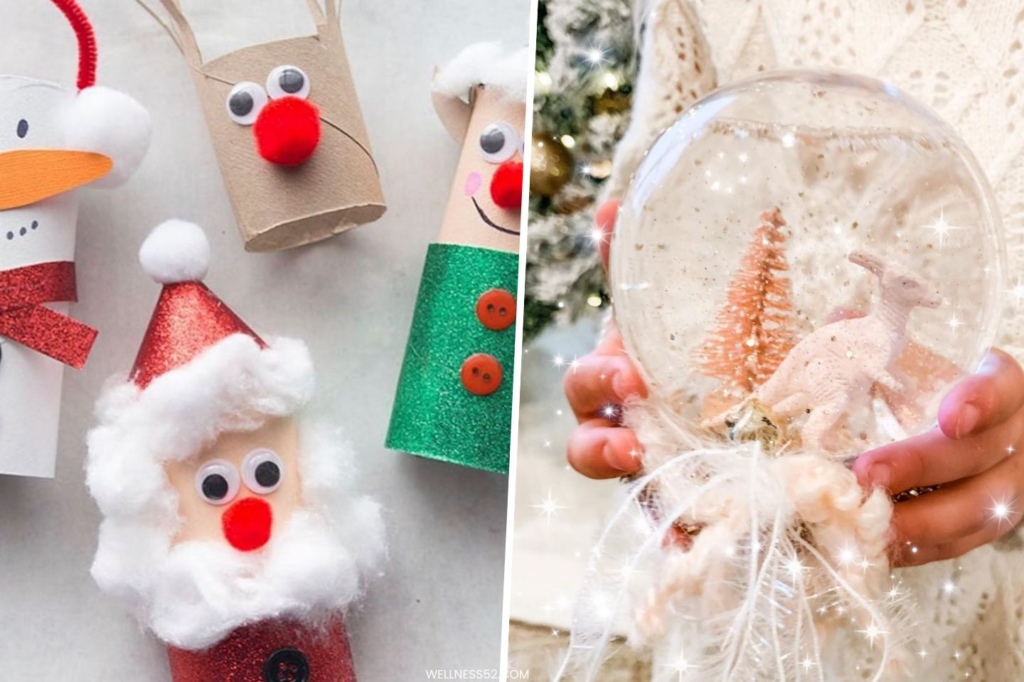
5. Snow Globe Jars
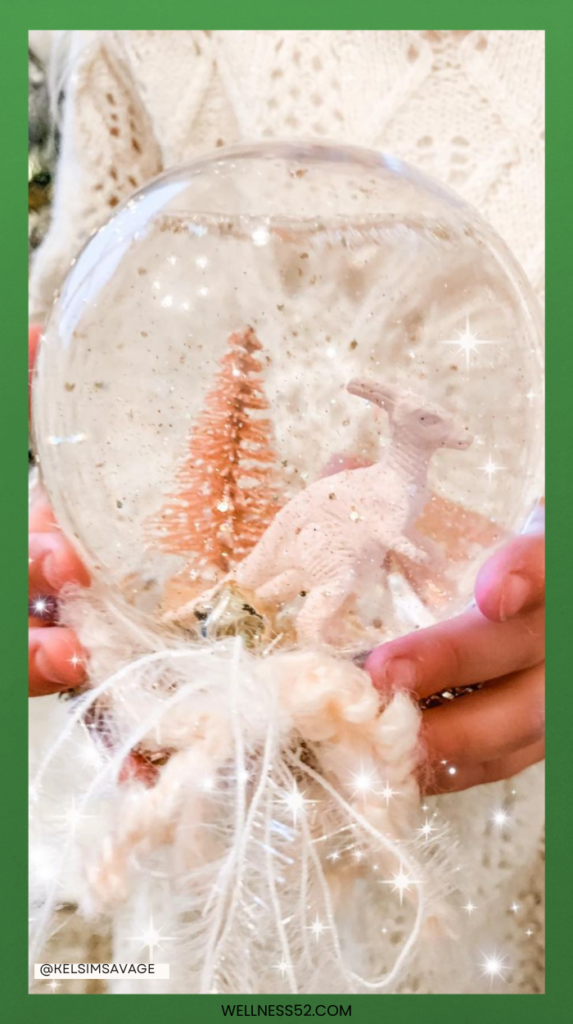
Create a magical winter wonderland with homemade snow globes. Fill a jar with water, glitter, and small figurines like snowmen or trees.
Secure the lid tightly, and let the kids shake it up to watch the snowfall!
Materials Needed for Snow Globe Jars (for 5 snow globes):
- Clear jars with tight-fitting lids (5 jars)
- Small figurines (e.g., snowmen, trees, animals – 5 sets)
- Glitter (white, silver, or any color you prefer)
- Hot glue gun and glue sticks (for securing figurines to the lids)
- Waterproof craft glue (to secure the lid tightly)
- Optional: Small decorations (e.g., mini presents, stars) to add inside
Optional:
- Ribbon or decorative tape (to wrap around the jar lids for extra flair)
Photo: Instagram @kelsimsavage
Pro Tip: Hot glue the figurines to the jar lid before adding water to keep them in place.
6. Marshmallow Snowmen for Hot Cocoa
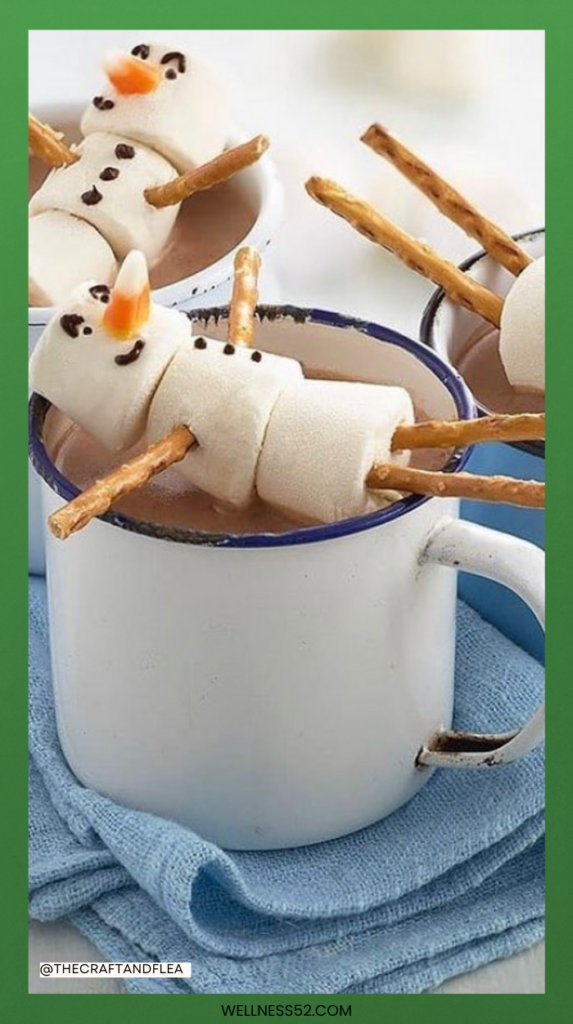
Marshmallows make the perfect material for crafting adorable snowmen to float on top of hot cocoa.
Stack three marshmallows to create the snowman’s head, torso, and lower body.
Use pretzel sticks for the arms and legs, and decorate with chocolate chips or edible markers for the eyes, mouth, and buttons.
Materials for 5 Marshmallow Snowmen:
- 15 large marshmallows (3 per snowman for head, torso, and lower body)
- 20 pretzel sticks (2 per snowman for arms and legs)
- Edible markers (for eyes, mouth, and buttons)
- 5 small candy canes (for nose)
- Optional decorations:
- Small icing tubes (for details)
- Sprinkles (for extra decor)
These supplies will be enough to create 5 adorable marshmallow snowmen, perfect for topping hot cocoa!
Photo: Instagram @thecraftandflea
Pro Tip: Add a candy cane scarf or a mini cookie hat for an extra festive flair. These marshmallow snowmen will float perfectly in hot cocoa, adding a fun and playful touch to your holiday drinks!
7. Toilet Paper Roll Santa
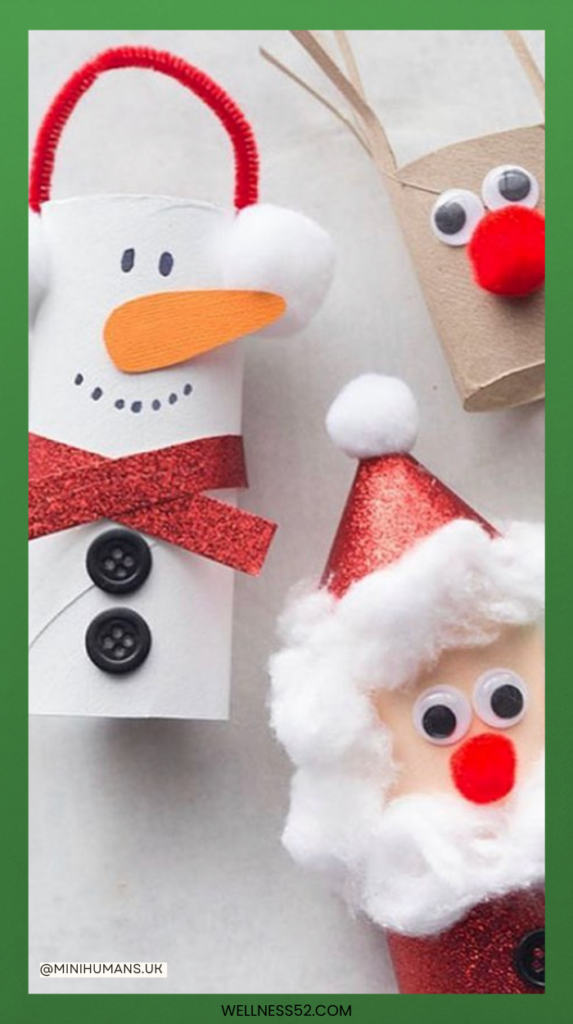
Turn your empty toilet paper rolls into adorable Santa decorations with just a few simple materials.
Wrap each roll in glittery red paper or paint them red for Santa’s signature suit.
Then, get creative by adding buttons, fabric scrap scarves, and tiny hats to complete the look.
Don’t forget the fluffy cotton ball beard to bring your Santa to life!
Materials Needed for Toilet Paper Roll Santa (for 5 Santas):
- Empty toilet paper rolls (5 rolls)
- Red glitter paper or red paint
- Cotton balls (for Santa’s beard)
- Red pom-poms (for Santa’s nose)
- Red glitter paper (for the hat, made into a cone)
- Buttons (for Santa’s bottom)
- Black marker (for drawing Santa’s face)
- Glue (for attaching decorations)
- Scissors (to cut paper and fabric)
Optional:
- Googly eyes (for Santa’s eyes)
- Mini pom-poms (for the top of the hat)
Photo: Instagram @minihumans.uk
Pro Tip: Use a black marker to draw a cheerful face, and craft a small carrot nose from orange construction paper for an extra festive touch.
Crafting with kids during the Christmas season is a great way to create memories and unique decorations that will bring festive cheer into your home.
From simple DIY ornaments to creative snow globes, these craft ideas will keep your kids entertained and add a handmade touch to your holiday decor.
So gather your supplies, put on some Christmas music, and get crafting with your little ones!
Whether you’re making ornaments for the tree or creating fun holiday decorations, the memories you make together will be cherished for years to come.